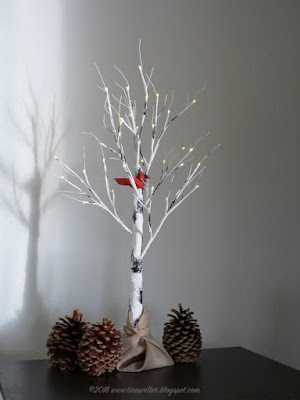
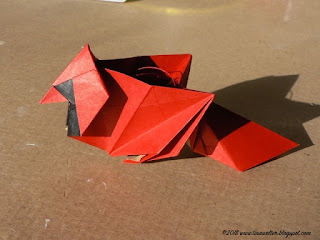
In November we bought a small lighted birch-like tree to add some ambient light to our dining room corner. After we set it up, I knew it needed a cardinal in it's branches.
Of course I went to the internet for ideas and wow, do you have any idea how many astounding origami videos there are on YouTube? Of course there are duds, but mostly they are pretty good. I ended up with a whole wish-list of videos I wanted to watch.
I certainly challenged myself by attempting to learn how to fold my first cardinal. I finally began therapy in December to get the strength and dexterity back into my left hand since the surgery in October. After two months of doctor ordered rest, my fingers were weak and I could barely flex my wrist. My poor hand was literally shaking by the time I finished folding and I was exhausted from the focus, but it was good exercise. I also learned a few things that I thought were important to share if you are a newbie to origami like me.
 |
| Sad cardstock bird, can't even stand up without two walls! |
1. The kind of paper does matter! I bought super light-weight card stock that was a perfect cardinal red and tried folding that first. The edges cracked and it was really tough to get the smaller folds, plus the black paint I used for the face ended up looking streaky. Ugh!
Nope, I needed actual origami paper, at least for this particular design. What a difference! The folded edges were crisp, the tricky reverse folds went into place easier and all the handling didn't make the paper lose color or show fingerprints. I still had to use black paint for the face since I couldn't find black and red paper, but this bird looked so much better.
2. The size of paper is important! I only have 6 inch paper and I tried to fold a super complex blue jay. Holy-moly, some of the folds became so tiny and thick. I finally had to stop folding and accept the bird I had. A larger sheet of paper would have been better for this particular design. Yes, I ignored the 10 inch paper recommendation on the video, I thought I could "make it work." :P
 |
| Looks more like a blue bird than a blue jay. |
3. Be precise and patient. Make certain you are meeting edges and points as perfectly as possible. Stop and start the video as many times as it takes until you understand what they are doing. Breathe, and start again, eventually it will make sense! Also, it is going to take you twice as much time as the video or more. Trust me.
 |
| Surprise, the cardinal design also makes a great blue jay! |
Click here to see Leyla Torres explain how to fold this cardinal designed by Roman Diaz.
I like Leyla's instructions because she uses some of the names for the folds. I learned a lot from watching her...over, and over and over... This cardinal has a lot of "reverse" folds, trickier than it looks, but do-able.
Click here for the beautiful but challenging blue jay by Seth Friedman
I couldn't complete Seth's design because my paper was too small, but mine still looks pretty good hiding in the branches. If you watch his video to see what this bird is supposed to look like, you will understand what I mean.
Click here if you love dragons!
I don't know if being born in the year of the dragon has anything to do with it, but I really like dragons. So when I saw this video by Shinyorigami, I just had to make one or two or..? Surprisingly, this design seemed much easier than the cardinal or blue jay. Perhaps it is just a case of practice changing my perception!
I do know that after my 8th cardinal, I figured out for myself how to do some shaping to puff the bird's chest out and get the tail at the right angle so he would stand on his tiny paper feet. Tada!
 |
Happy folding!
>^-^<
Tina


No comments:
Post a Comment