Bird & Sunrise photo

Bird & Sunrise photo
Because "someday" is today!

Friday, December 28, 2018

Red and Green Only

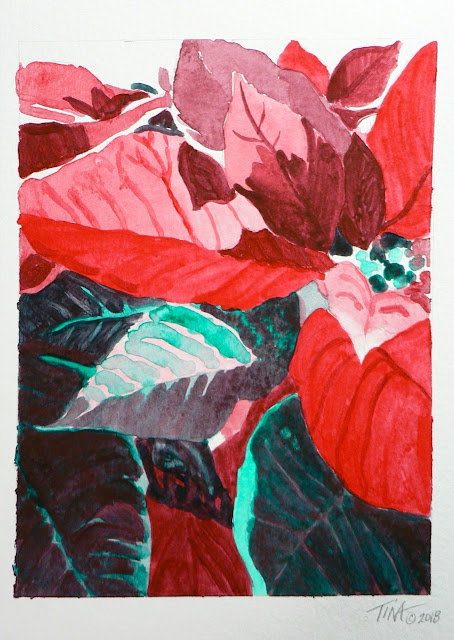
Surrounded with the beautiful colors of red and green during the holiday season, I wondered what would happen if I mixed them. Could I make a whole painting with just the limited colors of red and green? Here is what I discovered.

Napthol Red and Pthalogreen Poinsettia leaves, ©2018 Tina M. Welter
"Red and Green Only" poinsettia

First I looked for some tips on the Golden Acrylics website. I found a whole page on the topic of mixing colors which was really helpful. Here is the link: Golden paints mix guide

The guide said that Napthol Red Light mixed with Pthalo-Green would make black. I was curious. I had those two acrylic colors in my paintbox, plus Napthol Crimson. I mixed them both with the Pthalo-Green to see what the color difference might be. It's subtle, but I could tell the Napthol Crimson was a bit towards the cooler blue side. I decided to use the Napthol Red Light since it's warmer tones were more like the poinsettia leaves I wanted to paint.

Color mixing Napthol Red and Pthalogreen acrylic paint ©2018 Tina M.Welter

I have to admit, it was hard for me to make a painting with just those two colors because I could see yellow and other warm browns in my reference photo. I normally paint what I see, so I had to fight against my instinct to add yellow or white to the mix! I pushed myself to stick with only red and green and the result was the poinsettia leaves painting above. It's kind of an odd painting, but also interesting at the same time. The missing primary yellow color seems to have created a puzzle my brain wants to keep solving. :D

I decided to try exercise number four listed in the mix guide, using the specific "organic" colors suggested of Hansa Yellow, Quinacridone Magenta and Pthalo-Blue. Note: "organic" in this sense means color pigments created in a lab using the principles of organic chemistry. These are not colors derived from minerals or ores found in nature.

I only had the Pthalo-Blue color as acrylic paint, but found the other two colors in an old set of watercolors and they worked just fine. The important part is that these three colors were all organic pigments in a water soluble form.

Color mixing Quinacridone Magenta, Hansa Yellow, and Pthaloblue ©2018 Tina M.Welter

You can see that the result was a gorgeous bright red and vivid green. Great, now what happens when I mix these two colors together plus a little white? The result was an interesting range of dull greens and earth brown tones. What could I make with these?

Red and Green make... ©2018 Tina M.Welter

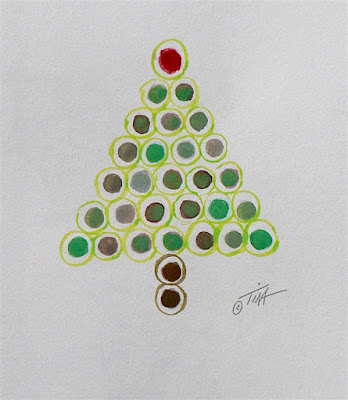
I arranged them as a christmas tree...

Red and Green dots make a Christmas tree ©2018 Tina M.Welter

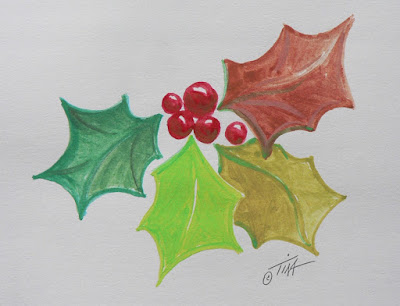
...then some holly berries and leaves as I tested out adding more or less of the vivid green to the bright red.

Red and Green make Holly Leaves ©2018 Tina M.Welter

Surprise, when I mixed equal parts of the red and the green I got a gorgeous red brown! A strange color for a holly leaf, but it made me think of the coat on a famous deer.

Red and Green make Rudolf's Coat. ©2018 Tina M.Welter

Well, that was really fun, I love being surprised when mixing colors. I took a look in my acrylic paint box and wondered what would happen if I mixed a generic red and green. These are not my professional paints, but a set given to me that I use in craft projects. The paint tubes were titled "Emerald Green" and "Cadmium Red hue." I mixed them together. The color dot to the left has more red than green and the dot on the right has more green than red. Next I added white to each of these.


Mixing Cadmium Red Hue and Emerald Green  ©2018 Tina M.Welter

Hmmm, what could I paint using these colors? The light purplish grey color made me think of angel wings and the dark red brown would make nice hair. So far, so good, but eventually I realized I had to add yellow to make the fair skin tone I wanted and the halo of course. Close, but not purely red and green only.

Green "Holly Angel" acrylic paint on paper ©2018 Tina M.Welter

What did I learn? It is possible to make a decent painting with only a primary color and it's secondary complement. Even a generic red and green will make a good brown and adding white will provide even more options. I could do a lot with those limitations. Choose your subject wisely though, I feel I got away with painting a poinsettia since it is already mostly green and red. With the angel, I seriously felt compelled to add another primary color, yellow, to give some warmth and enough contrast to balance out a really cold palette. I suppose I could have tried a very pale pink or green for a skin tone, my angel certainly would have looked "unearthly" all right!

After this experiment, I do feel inspired to test out the other primary colors and their complements. What paintings could I make with just yellow and purple or blue and orange? Hmmm...

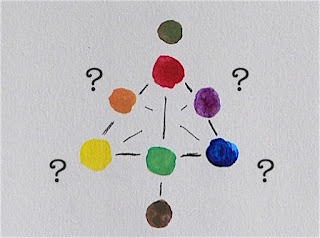
Extremely basic artist color circle  ©Tina M.Welter


Happy creating!

>^-^<
Tina

Tuesday, November 13, 2018

Little bits of color, Big impressions.

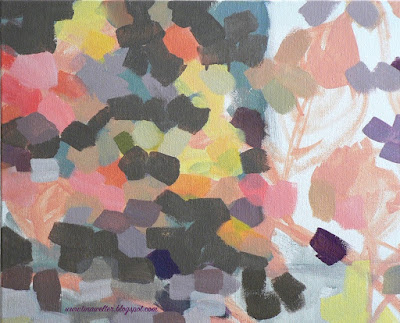
Season Finale painting, color and brush stroke detail ©2018 Tina M.Welter
Season Finale painting, color and brush stroke detail ©2018 
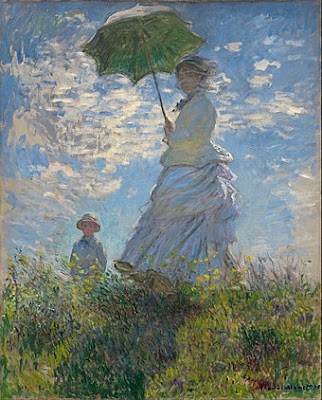
I've always been inspired by the impressionist painters. It's not just because they caused a big stir in the 1860's French art scene by going against the centuries old painting traditions of the Academy of Fine Arts. I didn't know anything about their painting "rebellion" until I went to college. I certainly wouldn't have guessed that using primary colors directly on the canvas, choosing to leave your brush strokes visible, and painting outside to record scenes from everyday life was controversial. I just loved the colors and the sense of light that sparkled across the canvases of Claude Monet. 
 
Claude Monet, Woman with a Parasol - Madame Monet and Her Son (Camille and Jean Monet), 1875, National Gallery of Art, Washington, D.C.
Claude Monet, Woman with a Parasol - Madame Monet and Her Son
1875, National Gallery of Art, Washington, D.C.
images from Wikipedia


Claude Monet, Haystacks, (sunset), 1890–1891, Museum of Fine Arts, Boston
Of course, admiring a beautiful style of painting doesn't translate into being able to actually paint in that style. It's been years since I have tried, but I've decided to attempt it again. 

For me, part of the puzzle is learning how to break down the color I am seeing into little pieces and then having the restraint to paint those small bits as individual brush strokes. This has always seemed overwhelming to me, but I recently came up with a solution. I used an effect on my computer to "crystallize" my reference photo to help me focus on those little bits of color.
 
Season Finale photo "crystallized" ©2018 Tina M.Welter

Perhaps some folks will think this is cheating, but for me, it feels like using training wheels on a bike. I know practicing this skill will alleviate my overwhelm now and hopefully make it possible for me to become more confident painting this way.

So far, this strategy is working quite well. I've been able to get the basic colors and shapes down a lot faster than usual. Compare my first day painting to what I accomplished only eight painting days later.

Season Finale, acrylic on canvas, first day painting ©2018 Tina M.Welter
Season Finale, 36x48 inches - first painting day ©2018
Season Finale, 36x48 inches, acrylic on canvas ©2018 Tina M.Welter - not completed
Season Finale, 36x48 inches - eighth painting day ©2018
About 1/4 of the right side isn't completely covered with the first layer of paint, you can still see the white canvas showing through. Once I get all of the canvas covered, I'm going to try refining the shapes with more complementary colors and smaller brush strokes. 

The Impressionists wanted to capture the effects of light by not blending and shading colors smoothly on the canvas. They experimented with placing small brush strokes of primary colors and their complements together in such a way that the eye of the viewer does the color mixing instead. It's an ambitious goal and I think of it as one of those beautifully creative ideas that was perhaps a first step towards making the technology of television and computer screen pixels that we are familiar with today.

If you are interested in reading more about how the Impressionism movement began, who was in it and what the painting techniques were, this Wikipedia entry is really helpful. Click here


Happy learning and creating!

>^-^<
Tina


Sunday, September 30, 2018

Happiness is a Big New Canvas

 
Crab apple leaves and fruit, ©2017  photo by Tina M. Welter
Crab apple leaves and fruit, November 2017


Oh the possibilities! It's always exciting to start a new project. None of the frustrations that will inevitably surface have arrived yet. That big canvas is one beautiful, wide open expanse ready for exploration. The best part is that I can envision the painting in my mind and it looks great. :D I savor that moment, because reality will surface soon enough and cause me plenty of creative anxiety! 


Roughing in basic design layout with thinned paint wash.

I learned a lot from my first large painting. These are the lessons I want to share and that I will be taking with me for this second try. 

1. It takes so much more paint that I expected. Plan on several layers of acrylic paint to get good coverage of the canvas and to add depth to the colors. Be patient!

2. Don't take the extra time to paint the under-grid, it's not necessary. Drawing it on the canvas lightly with pencil is fine.

3. Loosen up! Don't worry so much about getting the shapes and colors perfect on the first try. Acrylic paint dries fast and is super forgiving. Plus those layers add character. Warning: Do be cautious about putting the paint on too thick though, unless you want that texture. Edges from lines of thick paint will be visible even under several following coats of paint.

4. Thou shalt not dive into the details too soon! This only leads to frustration and wasted time, trust me. Focus on getting the large shapes and values right first. 

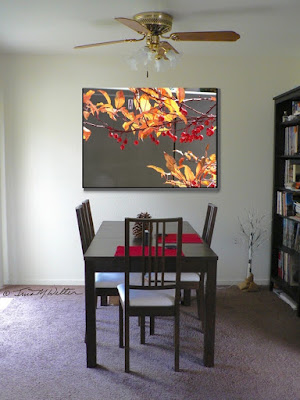
I hope those thoughts were helpful, especially if you have a large wall just begging for a painting. Here is our dining room wall that I have been pondering over for more than a year.

Photo of our dining room and wall, imagining the painting possibilities.

I imagined so many different images for this space. I tried several of my flower photos and they just didn't feel right. Finally, both Jeff and I felt this fall photo of the crab apple fruit and leaves from the tree in our front yard suited the color scheme and had the right mood. I remember taking the photo as kind of an afterthought. I happened to notice the light on the leaves when I was going in the front door after a walk and made myself go and get my camera. It just goes to show you never know when a great photo opportunity is going to happen.
 
Our dining room and wall with photo insert, imagining the painting possibilities.

Now begins the uphill climb of trying to capture something of that light and movement in paint. The adventure of exploring another lovely big canvas has begun.

Happy creating!

>^-^<
Tina
p.s. Photo of that little crab-apple tree from today. It's fall glory of golden leaves will be appearing soon.

Dwart crab apple tree in our front yard full of fruit.

Tuesday, July 31, 2018

It's a Celebration!

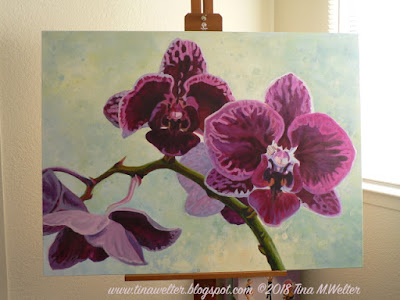
Finally, I finished that large painting of orchids that I started last fall! I was making good progress January-February, but had an unexpected request for several illustrations in March that sent me down a long sidetrack.

Red violet orchids, acrylic painting

 Since then, that painting has been hanging around in the background, haunting me like an unquiet ghost. For me, the souls of unfinished projects are terrible creatures, especially when the artwork is so large that I can't conveniently hide it in a drawer to muffle it's insistent demands to "complete me!"

As a bonus, which should completely appease this ghost of projects past, I made a slide show and composed music especially for this artwork in process.

Orchids, painting over time... (click link here) 

I hope you will enjoy it too. Whew, no more haunting until the next big project! :P

>^-^<
Tina 


Saturday, June 30, 2018

Bring on the Roses

It's summer and that means roses! After all the study of pruning tutorials, healing of scratches and battling with aphids, it's finally time to get out the camera and capture some of those blooming beauties waiting outside.

As always, glamour shots require good lighting. 

Rose Cascade, photograph ©2018 Tina M. Welter
This is a pretty shape, a nice cascade of roses and leaves but where is the drama? Not enough light and shadow to bring out the character of the leading ladies.

Five Rose Bushes in a Row, photograph ©2018 Tina M. Welter
Now this time of day looks more promising, just look at those highlights and shadows. I'm going in to scout for some stunning close-ups.

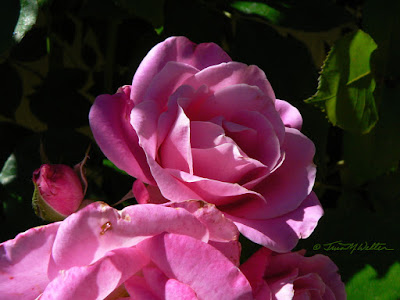
Single Lady- rose portrait, photograph ©2018 Tina M.Welter
 Now that's a portrait. This single lady is looking fine.

Sisters Three, pink roses photograph ©2018 Tina M.Welter
 All three of these sisters shine.

Young and Old, pink roses- photograph ©2018 Tina M.Welter
Even the young and the old glow in this perfectly angled light.

It's always a thrill to find new stars just waiting to be discovered when I stop and photograph the roses.

Happy creating!

>^-^<

Tina

Thursday, May 31, 2018

Did Your Eyes Understand What My Paint Brush Was Saying?


Pink, white and green, Springtime Delight, 6x12 inches, acrylic on canvas ©2018 TinaM.Welter


I recently had an interesting conversation with a friend who asked, "what if I want to try painting, but I can't draw at all?" and "would what I make be considered art if it doesn't look realistic?" We had a great discussion about how only using the elements of color, shape and texture is a completely valid way to make art.

If you have ever wondered this yourself, perhaps you would like to try the challenge of creating Abstract art. The on-line dictionary defines Abstract art as art that does not attempt to represent external reality, but seeks to achieve it's effect using shapes, forms, colors and textures.

Personally, I find making Abstract art really challenging! It feels safer to go by the visual roadmap outside of me instead of the one inside of me. I know the beautiful things I see in the real world will most likely be beautiful on the canvas. It's kind of scary for me to go creating without a clear visual destination ahead. 

Many people think abstract art is so simple, a child can do it. Perhaps they can, but can you re-create that childlike creative freedom as an adult? Try it and see. It is possible to have an unexplored gift for this type of painting, so of course it would seem simple to you. Remember the best abstract art still has to balance the elements of color, shape, texture and design to be visually interesting.

Abstract art is also about exploring the emotional internal landscape and being able to successfully communicate that world to others without using obvious, recognizable images. See what I mean about it not being a simple art form?

What I find the most interesting about really good abstract art is how much it is an expression of the individual artist, like an emotional fingerprint or snapshot.

In the interest of expanding creativity by trying new and scary things, I am going to step out of my comfort zone of realism and put the the advice I gave my friend to the test.

The first element I am going to focus on for inspiration and some direction is color.

One of my all time favorite resources for color inspiration is a site called Design Seeds. The blog owner creates these beautiful color palettes from photos of just about anything. If you love color as much as I do, prepare to spend some time here. You can search by color palette or subject matter. Click on the button, "explore by" on the top of the page. Here is the page I found by searching one of my favorite colors, periwinkle. Design Seeds inspirational color.  
So many lovely choices! This is the one I decided to use.


Lovely spring colors, "Flora" ©April 2018, Design Seeds

Next I mixed up my palette from acrylic paints. I used three colors, Chromium Oxide Green, Cadmium Yellow Light, Prisma Violet and Titanium White to make the six color palette. 


Green, Purple, Pink, Color palette ©2018 Tina M.Welter

The next element I chose was shape. I went with circles, mostly because I had all kinds of various sized cups and bottles handy on my desk. Also, after choosing the color palette it gave me an idea of what I wanted to convey and I thought circles might be a good choice.

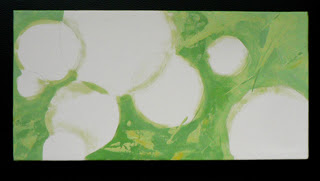
White circles, green background

I traced/drew the circles in pencil on the canvas and then painted the green background around them using brushes and a canvas knife.

Pink circles on green background

Next I added the purple and pinks... Yikes, I have hit the ugly stage and I have no idea where I am going with this! I know the emotion I want to express, but I'm not certain how to get there. I find I am thinking a lot about design and what I know about color. Hmmm...when in doubt, paint it out, i.e. bust out a big brush full of Titanium White! ;D

Abstract floral painting, pinks, green and white.

Whew, saved by the big brush! The white softened the hard edges of the pinks and purples and I felt I had a direction again. I started adding some little detail circles in light green and found myself naturally making the seashell swirl that I have been doodling since I was a teenager. I went with it. This is what I mean by Abstract art being a sort of fingerprint. Each artist has their own "go to" shape they naturally make and this one is mine. I haven't used it purposefully in a painting in years, but there it is.

Now, the important question. What emotion or idea does this little painting convey to you? Comment below or on the Facebook page. I'm curious to see if I was successful at sending my message to you. 

Happy creating!

>^-^< 
Tina
p.s. If you want to see a masterful use of acrylic painting techniques in a short 3:22 minute video, check this link out on YouTube.    SurajFineArts - Abstract painting 


Monday, April 30, 2018

Diving In

Wild Canary takes a  break in the ornamental cherry tree outside my kitchen window. photo ©2018 Tina M.Welter
Wild canary takes a break in the ornamental cherry outside my window.

It's spring! Time to get out the camera and go flower hunting. Capturing flower photos isn't as easy here in our neighborhood in Nevada as it was in Baker City, Oregon but thankfully, I have a few in my own yard to enjoy. Plus, we seem to be in the flight path of more varieties of birds returning after their winter away and that has been a delightful surprise.  

Since we are living in a rented home, I suppose it wasn't surprising that the flower beds were a complete weedy tangle when we moved in last June. Most people aren't as motivated or obsessive, depending on your viewpoint, as I am about growing things. I was determined to get some bulbs in last fall before my hand surgery and happily my good works were rewarded with some early blooms.

Purple and white crocus blooms in my yard, photo ©2018 Tina M.Welter
Crocus Triple Play. Pow, what a display!

I wish I had some more paintings of flowers to share with you instead of just my photos, but I have a large illustration project that recently came my way about a month ago. I am working on 20 illustrations for a book proposal. I was hesitant to accept doing it since I haven't done illustration for so long and just the idea sent my Inner 'Fraidy Cat into a full anxiety tap dance routine in my head!

Daffodil Single, photo ©2018 Tina M.Welter
Daffodil Single. Just plain elegant.

I felt it was important to try stepping out of my comfort zone, so I insisted that 'Fraidy take off the tap shoes and I dove in. The part I love about illustration is the research and the internet has made that a much easier adventure. I'm old enough to remember the days before personal computers, when research meant spending hours in a library or buying books to find the reference I was looking for. Do you want to know what people were wearing in the 1800's? (Yes, this is a topic I needed to know more about.) No problem, just dive into the multitude of rabbit holes on-line. Here is a woman who records herself getting dressed in period clothing from the underclothes on up! Amazing. "Dressing Up" link = 9 min. includes helpful descriptions + great music.


Single purple Grecian Windflower, photo ©2018 Tina M. Welter
Grecian Windflower. Delicate and strong!
 

I like research so much that it is a temptation to get stuck in that comfort zone too and procrastinate the drawing and designing step. Again, I have to remind my Inner 'Fraidy Cat to "just dive in!" I can't solve all the design issues in my head, I have to get the pencil or paint on the paper first, then I can judge if what I imagined is going to succeed or not.

Test watercolor River, trees and temple at sunrise, LT project image #2 ©2018 Tina M.Welter
Test watercolor, LT project image #2 ©2018 Tina M.Welter

It helps to remember that it usually gets better once I take the creative plunge and give it my best dog-paddle!

Happy creating,

>^-^<
Tina


Saturday, March 31, 2018

What a Relief it is!

'Fraidy Cat paints a rose, 5:7 digital art ©2018 Tina M.Welter
'Fraidy Cat paints a rose, 7:5 digital art ©2018 
Expectations. Do you know what yours are? Whether we recognize them or not, we all have them. To keep from spending time in an emotional ditch, I've found it's definitely worthwhile to lift the hood and take a closer look at how that program running quietly undetected in my brain is interpreting my day. 

As much as I try to be aware of why I do what I do, I can get blind-sided by my own expectations, especially when it comes to creative projects. That road has an abundance of the bone-jarring little rascals. If I find myself overwhelmed with an intense case of disgruntled grumpiness, I know it's time to pull over and get out the shovel.

Expectation pothole #1. This finished project should look or sound exactly how I imagined it! Arrrgh. The disparity between what I imagine and what ends up existing in the real world can be very disheartening.

Expectation pothole #2. Why is this project taking so much %#&* time? It was supposed to be done by now! Thinking I can do more than I can in the time I have is an especially nasty pitfall for me.

Expectation pothole #3. I thought they would love that artwork as much as I do. Hmmph! It can really hurt when something you worked so hard on gets negative feedback, or gets dismissed as "not serious art."

Thankfully, over the years I have learned to keep some pothole fillers on hand. The most important of these was to make of up mind not to let these jolts stop me completely. The second was learning how to adjust my expectations.

Expectation adjustment #1   It's ok if this project doesn't look exactly how I imagined, the process of creating is after all, a process! What did I learn? What do I like about what I made? Make a plan how to do better next time.

Expectation adjustment #2  Accept my creative process as valid as it is and stop comparing myself to others. Keep track of how much time it really takes me to make something. Remember to include time for making mistakes!

Expectation adjustment #3  People are going to like what they like and I can't do one thing to change whatever that is and that's o.k. If I can make an adjustment to suit them, great. If not, send them to another artist. I will find other folks who love what I do as it is.

This is just a sampling, but next time you feel your overwhelm reaching the boiling point, stop and measure how high your expectations are. I can guarantee, it's a real relief to release some of that pressure! 

Happy creating,

>^-^<

Tina


Wednesday, February 28, 2018

Bust out the Big Brushes

Three plum colored orchid blooms in different stages. Acrylic painting on canvas.
Detail, "Serenity"  February 28, 2018

I made good progress on the "Serenity" orchids during November 2017, but then a portrait commission in December put everything on hold.

Getting a project rolling again can take so much energy, all the initial excitement is gone, plus often the midway point in a painting is like puberty, it just looks plain awkward. Plus, all the second guessing begins. Why I did I think those colors were a good idea? Good grief, this whole project feels stupid! 

Three plum colored orchid blooms in different stages. Acrylic painting on canvas.
"Serenity" Feeling stuck. February 16, 2018

So after noodling around with small tentative brushwork for over a week, trying to figure out how to love this project again, I decided to get out the big brushes. This tactic often helps me to stop obsessing about all the little details so much and just dive into the wonderful rhythm of painting with big strokes of gorgeous paint.


Three plum colored orchid blooms in different stages. Acrylic painting on canvas.
"Serenity" Now we're going somewhere! February 18, 2018

 If you find yourself feeling stuck on a project, challenge yourself to take a risk, think in bold strokes. Commit to a decision, make a change. For me, that means focusing on shape and value, cranking up the music and "doing" instead of "thinking." It really helps to break through those frozen gears and gets a stalled project back in the creative joy zone again.

I also find taking a daily photo helps. I can see how far I have come, or sometimes where I drove off the road completely.


Three plum colored orchid blooms in different stages. Acrylic painting on canvas.
"Serenity" In the beginning...November 7, 2017

I was sincerely hoping to have the Serenity Orchids completely finished for this post, but I am putting my perfectionism aside and sharing with you where the project is right now. It's close, but there are a few details and color balance issues that don't feel quite resolved to me yet.

Three plum colored orchid blooms in different stages. Acrylic painting on canvas.
"Serenity" Almost there. February 28, 2018

I challenge you to feel the thrill of reviving a stalled project. Get out those metaphorical big brushes and make a change!

Happy creating,

>^-^<
Tina
 

Tuesday, January 30, 2018

The Art of Folding

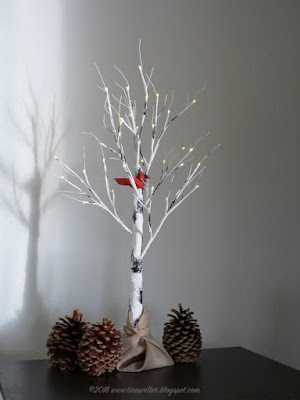
Lighted table top birch tree, photo ©2018 Tina M. Welter

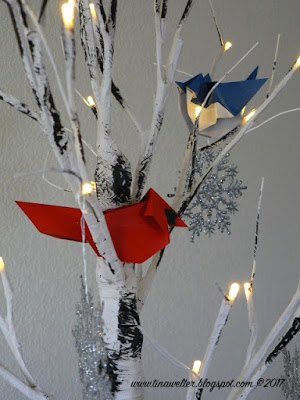
In November we bought a small lighted birch-like tree to add some ambient light to our dining room corner. After we set it up, I knew it needed a cardinal in it's branches. 

Of course I went to the internet for ideas and wow, do you have any idea how many astounding origami videos there are on YouTube? Of course there are duds, but mostly they are pretty good. I ended up with a whole wish-list of videos I wanted to watch. 

Lighted table top birch tree with origami cardinal, photo ©2018 Tina M. Welter

I certainly challenged myself by attempting to learn how to fold my first cardinal. I finally began therapy in December to get the strength and dexterity back into my left hand since the surgery in October. After two months of doctor ordered rest, my fingers were weak and I could barely flex my wrist. My poor hand was literally shaking by the time I finished folding and I was exhausted from the focus, but it was good exercise. I also learned a few things that I thought were important to share if you are a newbie to origami like me.

Card stock Cardinal, photo and bird ©2018 Tina M. Welter
Sad cardstock bird, can't even stand up without two walls!

 1. The kind of paper does matter! I bought super light-weight card stock that was a perfect cardinal red and tried folding that first. The edges cracked and it was really tough to get the smaller folds, plus the black paint I used for the face ended up looking streaky. Ugh!

Nope, I needed actual origami paper, at least for this particular design. What a difference! The folded edges were crisp, the tricky reverse folds went into place easier and all the handling didn't make the paper lose color or show fingerprints. I still had to use black paint for the face since I couldn't find black and red paper, but this bird looked so much better.
Cardinal designed by Roman Diaz, photo and origami ©2018 Tina M. Welter

2. The size of paper is important! I only have 6 inch paper and I tried to fold a super complex blue jay. Holy-moly, some of the folds became so tiny and thick. I finally had to stop folding and accept the bird I had. A larger sheet of paper would have been better for this particular design. Yes, I ignored the 10 inch paper recommendation on the video, I thought I could "make it work." :P

Blue jay designed by Seth Friedman, photo and origami ©2018 Tina M. Welter
Looks more like a blue bird than a blue jay.

3. Be precise and patient. Make certain you are meeting edges and points as perfectly as possible. Stop and start the video as many times as it takes until you understand what they are doing. Breathe, and start again, eventually it will make sense! Also, it is going to take you twice as much time as the video or more. Trust me.

Surprise, the cardinal design also makes a great blue jay!
 4. A metal ruler and basic wooden skewer are helpful for marking straight lines before you fold. The side of the skewer can provide a little extra pressure in creasing folds and the tip is great for getting into tiny corners that don't want to turn out.

Cardinal, Blue jay and Birch tree, photo and origami ©2018 Tina M. Welter

Click here to see Leyla Torres explain how to fold this cardinal designed by Roman Diaz.  
I like Leyla's instructions because she uses some of the names for the folds. I learned a lot from watching her...over, and over and over... This cardinal has a lot of "reverse" folds, trickier than it looks, but do-able.

Click here for the beautiful but challenging blue jay by Seth Friedman

Blue jay in the pine tree, photo and origami ©2018 Tina M.Welter

I couldn't complete Seth's design because my paper was too small, but mine still looks pretty good hiding in the branches. If you watch his video to see what this bird is supposed to look like, you will understand what I mean.

Click here if you love dragons!  

Green Dragon, photo and origami ©2018 Tina M. Welter

I don't know if being born in the year of the dragon has anything to do with it, but I really like dragons. So when I saw this video by Shinyorigami, I just had to make one or two or..? Surprisingly, this design seemed much easier than the cardinal or blue jay. Perhaps it is just a case of practice changing my perception! 

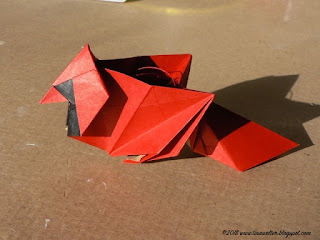
I do know that after my 8th cardinal, I figured out for myself how to do some shaping to puff the bird's chest out and get the tail at the right angle so he would stand on his tiny paper feet. Tada!

Standing Cardinal designed by Roman Diaz, photo and origami ©2018 Tina M. Welter


Sunny Standing Cardinal designed by Roman Diaz, photo and origami ©2018 Tina M. Welter


Happy folding!

>^-^<
Tina